Here are ways to improve the machine without adding a PID controller:
First off, ditch the outer plastic sheath on the pannarello frother. That whole assembly is for people who do not know how to steam milk1And who have better things to do with their lives than learn how.. It produces a foam of sorts, but nothing like the glorious micro-foam you’ll get in a good coffee shop. Just use the inner plastic bit, which has a lovely fine nozzle you can float just on or under the milk surface. With the right jug and a little practice you’ll be frothing beautiful milk.
Second, and more adventurous, ditch the entire steam wand. Replace it with a Rancilio Silvia wand. These are longer (better reach into the jug) and have a larger and well-formed injection nozzle. They also fit both the Gaggia Classic and the Gaggia Baby ranges. (Google for instructions – with the Baby, it’s a matter of pulling the wand out of the black plastic ball assembly with brute force – it’s just held in with a small plastic clip.) These wands are always available on ebay. Here, however, you hit a problem. The Gaggia boiler does not produce enough steam pressure most of the time for this wand to work because a) the thermostat keeps the temperature below 135°C most of the time and b) the boiler rapidly begins to run dry and steam pressure drops off. So if you want this wand, you need a decent electronic controller.
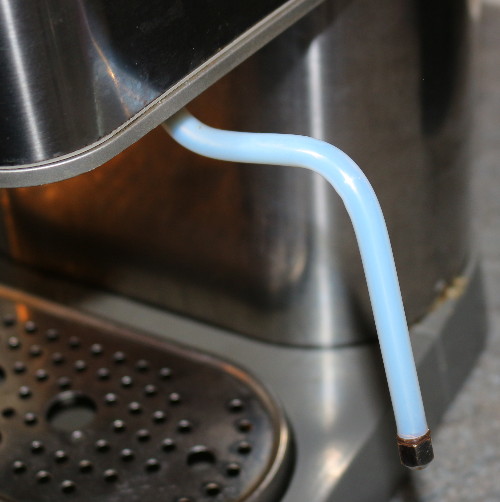
Third, and really wonderfully life-transforming, remove the silly little rubber sleeve from the Silvia wand and buy some Teflon tubing with 6mm internal diameter, unscrew the nozzle, shove the sleeving onto the wand and replace the nozzle. Teflon is amazing:
- It can handle high temperatures: way higher than the temperature of the steam.
- It doesn’t conduct heat well: so no more burning yourself on the metal wand. And, also, less heat loss from the steam as it passes through the wand.
- Nothing sticks to Teflon2So how do they get it to stick to saucepans?: burnt-on milk is the bane of frother wands – my wand doesn’t get hot enough and the milk wouldn’t stick if it did.
- It has a very low coefficient of friction: so with enough elbow grease you can shove it past the bends and all the way up to the top of the wand.
Voila:
Fourth, increase the heat conduction between the boiler shell and the brew head. Full details here.
Fifth, if you are very brave and adventurous and careful and probably only after you’ve also done the Arduino mods, double the boiler power. It gets the machine up to temperature so much quicker and also steams the milk more quickly.
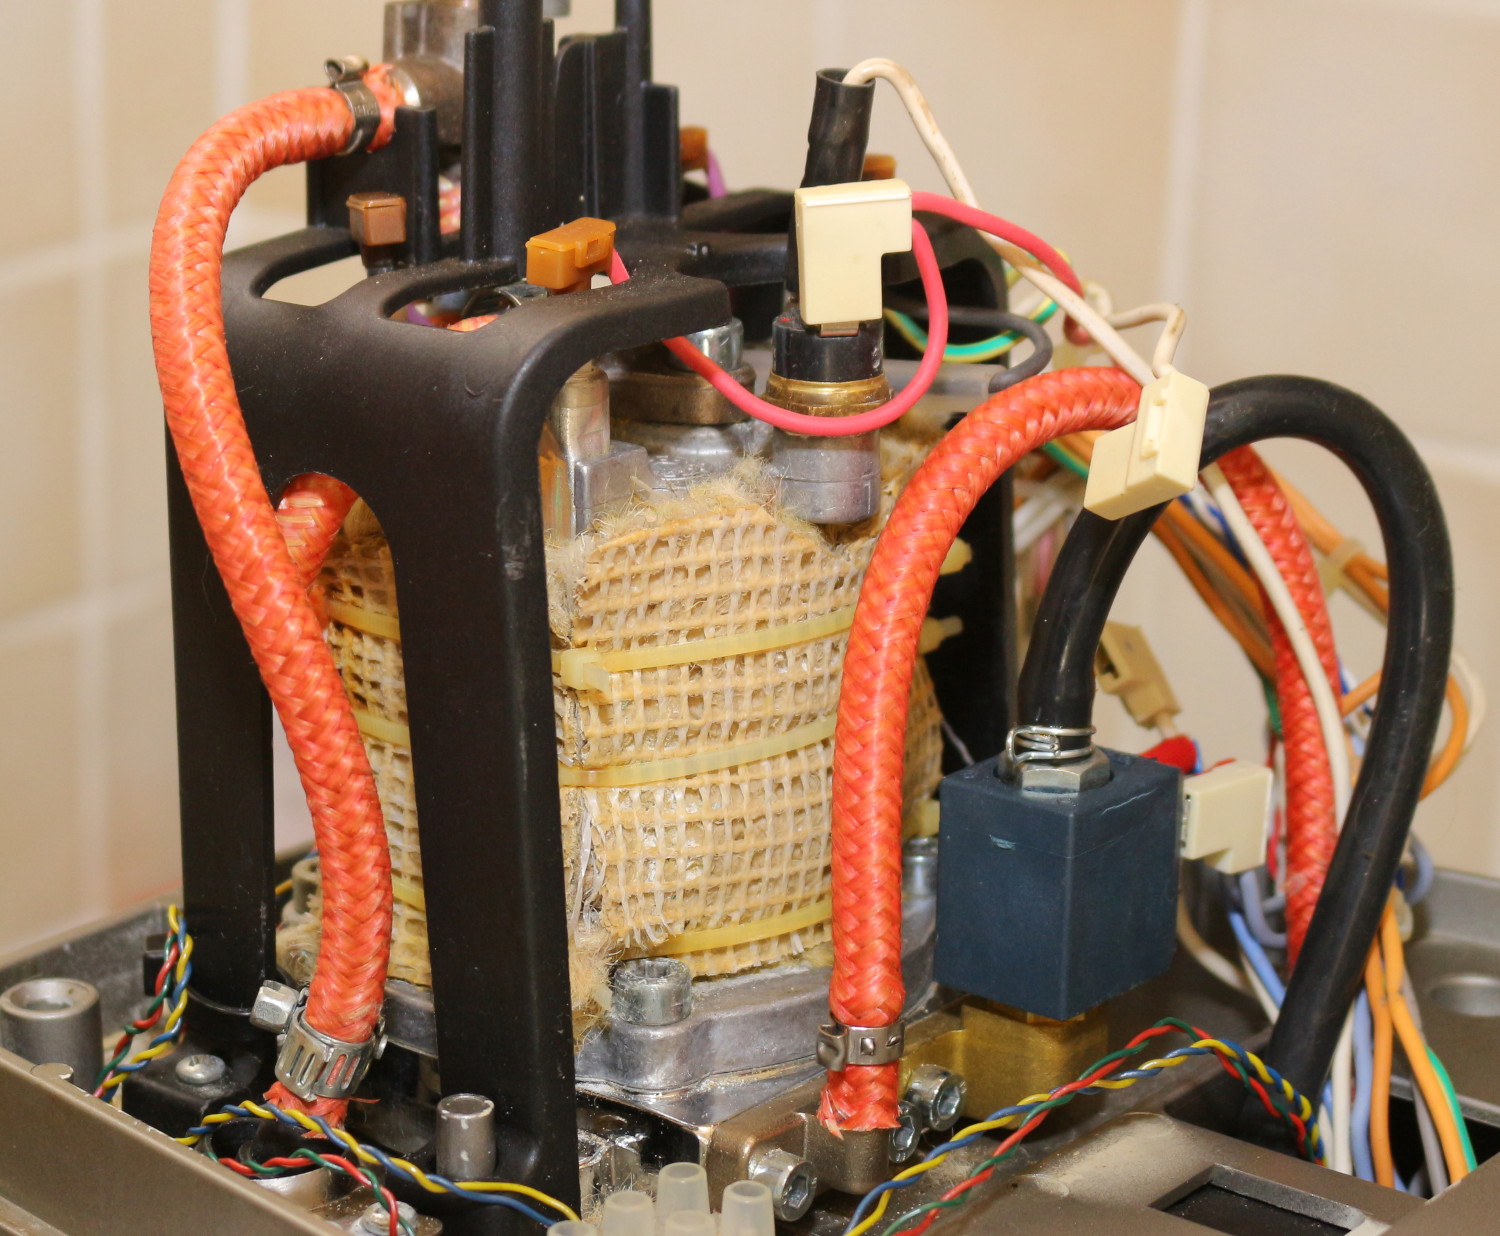
Finally, put some heat insulation around the boiler. This means faster warm up (especially for the second3or third or fourth, fifth, etc. cup of the day), lower electricity usage and better steam. Better steam because, with the Silvia wand and full steam flow, the full machine’s 1300W cannot heat the boiler as far as 140°C, which I take to be a reasonable upper bound for safe operating temperature4Well, a bit more than that actually, but not too much more.. Insulation helps a little with this. (Although if you double the boiler power this point becomes extremely moot.)
The key thing you want in heat insulation is low thermal conductivity and the ability to withstand well over 140°C without melting or bursting into flame (bear in mind that the hottest exposed parts of the heating elements will be higher than the water/steam temperature). I used some wool carpet offcuts because firefighters wear wool explicitly for its amazing high temperature properties5If you really want to impress visitors with your pimped kitchen appliances, why not cover the entire machine in sheepskin?.
Oh, and if you’re worried about losing the cup warmer on the top of the machine, just run some water into the cups before brewing.
[Update: the heat was eventually too much for the carpet which disintegrated after several years. I keep pondering the idea of making something out of silicone.]
Return to main coffee machine page.
| ↑1 | And who have better things to do with their lives than learn how. |
|---|---|
| ↑2 | So how do they get it to stick to saucepans? |
| ↑3 | or third or fourth, fifth, etc. |
| ↑4 | Well, a bit more than that actually, but not too much more. |
| ↑5 | If you really want to impress visitors with your pimped kitchen appliances, why not cover the entire machine in sheepskin? |
Hi Tom,
I’ve read about your modification to your Gaggia regarding replacing the rubber sleeve with the Teflon tube and it looks like this is a good solution to the cheap rubber sleeves that come with most machines. In addition to my Gaggia Baby, I have a LaSpaziale Vivaldi S1 which is my main machine at my house. I am looking to make this same modification since the rubber sleeves are pretty useless. I purchased a 12-inch piece of PTFE tube (Item #F015103) (10mm ID x 12mm OD) Fluorostore on Amazon since my wand is 10mm. Unfortunately, when I received this item it is very rigid and does not move past the bends. I’ve tried soaking the tube, and using a heat gun, however, neither make the PTFE flexible enough to slide past the bends. Would you be willing to let me know what type of Teflon tube you used, and where you purchased it? Also, did you need to do anything to slide it past the bends in your steam wand? Thanks in advance for your assistance.
Regards, Jeff
Teflon tubing is tough stuff. Mine is 1mm thick, so 8mm outer diameter with a 6mm inner diameter. I would think that 2mm thickness would make it considerably tougher.
It took a lot of elbow grease and some perseverance to get the 1mm stuff round the bends in the pipes. The second bend was harder because of the extra friction from the first bend. I think you probably need to find thinner tubing.